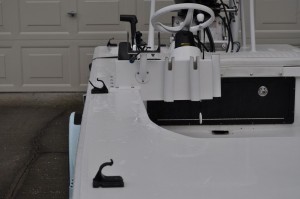
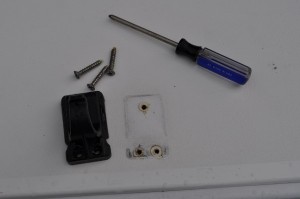
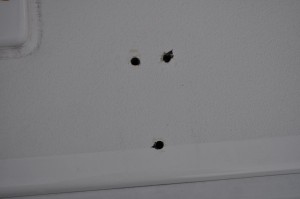
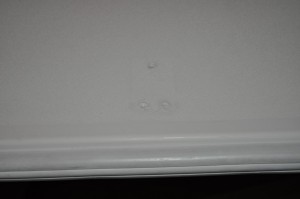
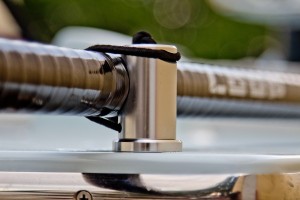
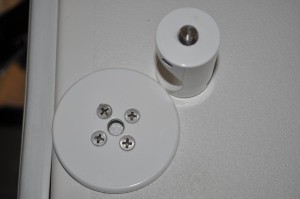
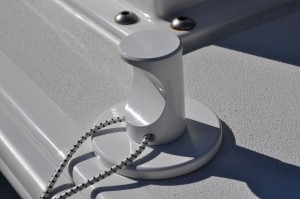
Remember if possible thru bolting (using bolts, washer and nuts) the push pole holder base plate on the flange or under the deck will provide the strongest mounting set-up for the base plate and will help ensure the screws do not come out of the deck of the boat.
Step
- Prep the deck of the boat
- Remove the old push pole clips (if boat is equipped with them)
-
- Remove any old dirt and grime from surface area where the new push pole holders will be installed.
-
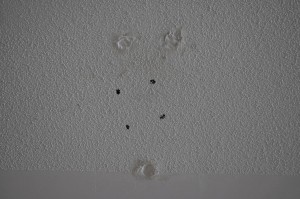
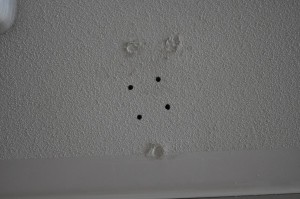
- Patch holes in deck from old push pole holders (V Marine Push Pole Holders use a different size screws, and have a different screw pattern than any existing Push Pole Holders)
-
- Instillation area should be dry and clean at the time of instillation.
- Remove your new V Marine Push Pole Holders from the protective packaging, and check the holders to make sure they were not damaged during shipping. If the parts are damaged in any way contact V Marine immediately at info@vmarineproducts.com
- Screw the top portion of your V Marine Push Pole Holders firmly onto the base plate. Once the top portion is firmly screwed onto the base plate then place the push pole holders onto the deck of the boat (so you can determine where you will to mount the holders). If using the medium or large base plate to cover the older holes on the deck of the boat please make sure the bend in the pole is not too great as to put unnecessary stress on the push pole which could lead to damage of your push pole or the push pole holders.
- Once you have the push pole holders set on the deck of the boat in the location you want to mount them determine how much room between the deck of the boat and the hull you have in this area (this is very important to determine as to not cause damage to the hull of your boat while predrilling pilot holes for the screws used to attach the base plate to the deck of the boat)
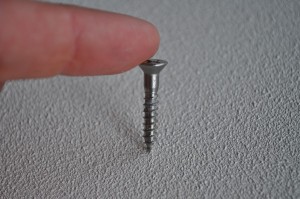
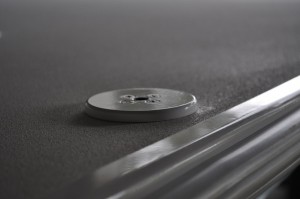
- Once you determine how much room you have in this location you can purchase the appropriate length screws/bolts for the application. Countersunk #8 stainless steel screws/bolts are recommended to be used for the design of the base plate to fit properly. Most customers’ use countersunk #8 1 or 1 1/2 inch stainless steel screws like the one pictured below (available at most marine stores). In November 2024 we have changed the base plate design which allows the small base plate to accept larger mounting screws. Please take the base plate to the store with you to verify the screw size that will work best with your base plate.
- Once you have the push pole holders in the location you determined you would like to mount them (again confirm the top portion of the push pole holder is screwed onto the base plate firmly)
- We recommend mounting the middle push pole holder first, which will help you mount the front and rear holders easier.
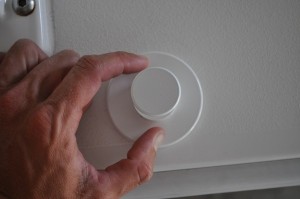
- FIRMLY hold the base plate with one hand while carefully unscrewing the top portion of the push pole holder (make sure the base plate does not spin or move at all during the process, or the top portion of the push pole holder will not end up mounted in the proper location) This is one of the of most important steps to get correct in the installation process.
- Once the top portion of the push pole holder has been removed mark the holes in the base plate with a pen or marker so you can predetermine where to predrill the screw holes for the base plate.
Once the holes are marked REPEAT STEP #6 and ensure the base plate did not spin/move while you were unscrewing the top portion of the holders the first time this step was performed. If the marked holes are different the second time from the first time repeat again to confirm which marks are the correct ones. It is VERY IMPORTANT to get this step in the installation correct. If you do not get this step correct the push pole will not sit properly in the grove that it sits in. (Example picture below) If the push pole sits in the grove incorrectly the push pole can wear the holders and vice versa.
The picture below is the incorrect way for the pole to sit in the grove.
The picture below is the correct way for the pole to sit in the grove.
- Once the holes have been properly marked remove the base plate and predrill the screw holes for the base plate. (Warning DO NOT predrill to deep or use to long of a screw or you will drill through the deck of the boat and into/thru the hull of the boat). If you are unsure how thick the deck of your boat is or if you are unsure if you will damage any portion of your boat installing the V Marine Push Pole Holders please contact your boat manufacturer prior to drilling the holes in the deck of your boat.
It is very important to drill the holes in the center of the screw holes on the V Marine base plate. It is also very important to predrill the holes straight down and not to predrill the holes at an angle (this will cause the screws not to fit properly (flush) in the base plate. If the screws do not fit flush the top portion of the holder will not screw onto the base plate correctly, and could damage the bottom on the top portion of the push pole holder.
- Place a marine adhesive of your choice (example 5200, 4200, 4000) on the shaft of the screws and the deck of the boat where the pilot holes have been drilled. Some people also choice to place extra adhesive on the bottom of the base plate for added security.
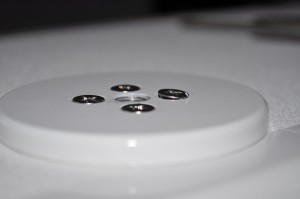
- Drill your #8 stainless steel screws/bolts into all three or four holes (depending on the size base plate) the predrilled holes on the deck of the boat (the base plate of the push pole holder should be attached to the deck when this step is complete). It is VERY IMPORTANT to make sure all of the screws are completely flush with the top of the base plate and that no portion of the screws is sticking above the top of the base plate.
If step #10 is not preformed properly or the screws in this step are not screwed in straight up and down they could look like the picture below. The right screw in the below picture as well as the left screw are not screwed in flush with the top of the base plate as they need to be. The top portion of the holder will not screw on properly with the screws like they are below and will damage the top portion of the push pole holder.
If you attempt to screw the top portion of the holder onto the base plate with the screws like you see in the picture above you could damage the anodizing/powder coating of the top portion of the holder (example picture below) The top portion of the holder will also not screw onto the base plate with the pole grove in the correct location.
- After this step is complete for the middle push pole holder grab your push pole and a person to assist you with the installation of the front push pole holder. Set the push pole holder on the front deck of your boat in the location you would like to mount the holder.
(Repeat step #3) Screw the top portion of your V Marine Push Pole Holders firmly onto the base plate. Once the top portion is firmly screwed onto the base plate then place the push pole holders onto the deck of the boat (so you can determine where you will to mount the holders). If using the medium or large base plate to cover the older holes on the deck of the boat please make sure the bend in the pole is not too great as to put unnecessary stress on the push pole which could lead to damage of your push pole or the push pole holders.
(Repeat step #4) Once you have the push pole holders set on the deck of the boat in the location you want to mount them determine how much room between the deck of the boat and the hull you have in this area (this is very important to determine as to not cause damage to the hull of your boat while predrilling pilot holes for the screws used to attach the base plate to the deck of the boat)
Have the person assisting you hold the rear push pole holder in the approximant location you think you will install the rear holder (he will act like the rear holder). Place the push pole in the middle holder that you just installed. You will grab the push pole with one hand while holding the V Marine push pole holder on the deck of the boat with the other hand (in the location you think you will install the front holder). This will allow you to adjust the angle that the grove in the front holder is at to insure that the push pole sits in the grove at the proper angle. See step #9 for a picture of the improper/proper angle. Repeat this step at least twice to insure that the push pole holder did not move/slide out of place while removing the push pole.
Once you have the holder set at the proper angle remove the push pole from the deck of the boat so it will not be in the way during the installation of the holder.
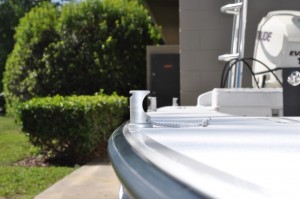
Below is an example picture of the angle of the front push pole holder. (the angle will vary based on what boat you are installing the holder on and the location you are mounting the holder on the deck of the boat)
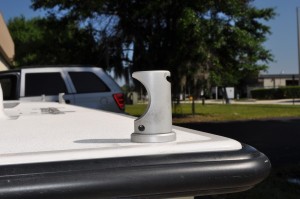
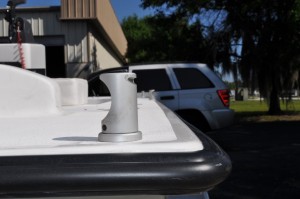
Below are two pictures showing an example of the angle of the rear push pole holder (the angle will vary based on what boat you are installing the holder on and the location you are mounting the holder on the deck of the boat)
- Allow the marine adhesive, the recommended time to dry prior to attaching the top portion of the V Marine push pole holder onto the base plate.
- Screw the top portion of the push pole holder onto the base plate; put your push pole back on the boat in your new push pole holders and GO FISH!!
Needed supplies for instillation
-
- Countersunk #8 Stainless steel screws (stainless steel washer and nut will be needed too if you decided to thru bolt the base plate to the deck of the boat.)
- Marine adhesive (for placing on the screws so there is no water intrusion into the hull or in the screw holes on the deck)
- Drill with a bit which will be used to predrill hole for the screws on the deck of the boat
- Screw driver (wrench will also be needed if you decide to thru bolt the base plate to the deck of the boat)
- Marker, any color that you can see on the deck of your boat.
Warnings
Any of the below described actions will damage the push pole clip beyond repair.
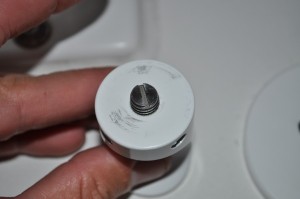
Do not attempt to remove the bolt from the bottom of the push pole clip
Do not grab the threads of the bolt with pliers for any reason

